Kino supports importing timelines from Final Cut Pro by reading the Library (Documentation Index
Fetch the complete documentation index at: https://kino.ai/docs/llms.txt
Use this file to discover all available pages before exploring further.
.fcpbundle) format directly.
You don’t need to upload terabytes of footage or export your timeline to XML - just drag and drop your library into Kino and we’ll read only what we need, all client-side.
Import Your Library
Open Kino's import page
Visit Kino’s import page to begin importing your Final Cut project.
Open the Timeline Import Tool
Navigate to the Timeline Import Tool in Kino (available in developer tools).
Consolidate Library Media
Right click your library in Final Cut Pro and select “Consolidate Library Media…”. If you see “there are no files to consolidate”, you’re already good to go.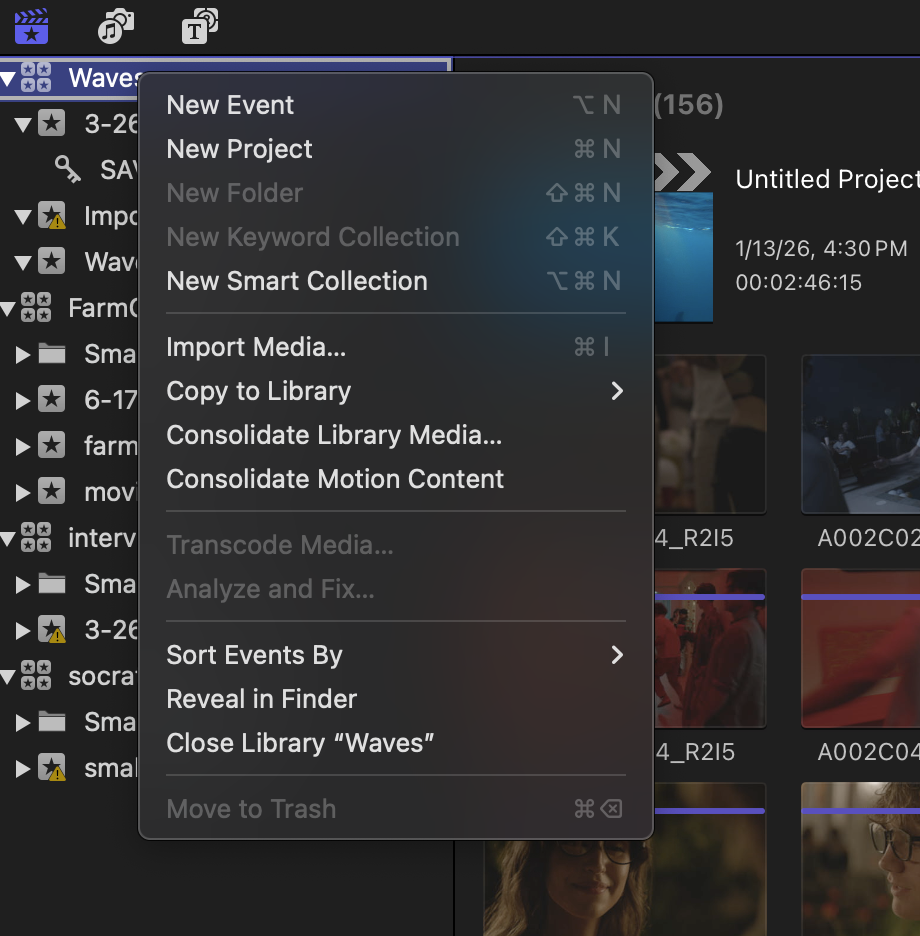


Select a timeline
If your library contains multiple projects (timelines), select which one you want to import.
Review media matching
Review the media matching results:
- Green checkmarks indicate successfully matched files
- Red X marks indicate files not found in your library
What Gets Imported
| Imported | Not Imported |
|---|---|
| Clip positions on timeline | Effects and plugins |
| In/out points | Transitions |
| Video and audio tracks | Color corrections |
| Transform properties (scale, position) | Speed effects |
| Source file references | Compound clips |
Troubleshooting
Properties of your original project not getting imported?
Properties of your original project not getting imported?
Reach out to us at support@kino.ai and we’ll help you out.